Set up a VM with Visual Studio code
Some of the tools used to generate documentation are only available on Linux. Therefore, the Live Preview does not currently work in Visual Studio Code on Windows.
Below is explained for Windows users step by step how to create a virtual machine with Ubuntu and set up Visual Studio code including running live preview for rst-files. Emphasis is the configuration of the Linux environment and not the establishment of the VM, there are numerous good descriptions on the Internet.
Preparation of the virtual machine
- Download and install the free VMware Player from vmware.com. Of course, all other players for virtual machines are possible, but the following description refers in part to the VMware player used.
- Download iso image from Linux. This can eg. in the download area of https://www.ubunutu.com be downloaded. Use the latest desktop version (not the LTS version).
- Install Ubuntu in VMware: => Create New Virtual Machine. Then select the Ubuntu image and follow the further steps.
- Configure VM. To do this, select the virtual machine in the left selection area and then select the menu item “Edit Virtual Machine Settings”. In the hardware tab then allocate about 2GB memory (at 4GB of physical memory). Depending on the number of CPUs, assign at least half of the physical CPU cores (not to be confused with the number of virtual CPUs).
- Start Ubuntu in VM: => Play Virtual Machine.
- Ignore hints to VMware tools or select to install manually. The vm-tools will later be installed as a package.
For a detailed description of installing VMware search in the internet.
Basic configuration of Ubuntu
The next steps will be executed in the terminal window. This can be opened with Ctrl-Alt-T. With a right click the terminal can be fixed with “Lock to Launcher” on the left toolbar.
Use
sudo dpkg-reconfigure keyboard-configurationto change layout to the layout for your keyboard to german. In the Generic 105-key keyboard submenu, then navigate to OK using the cursor keys and then select the german language on the next page.Install VMware tools with `` sudo apt-get install open-vm-tools``. The VMware tools are necessary to eg. Adjust screen size to window size, enable copy-paste between host and VM etc. After the package is installed, shut down and restart the VM.
Install Visual Studio Code. Open Firefox from the left toolbar and change to https://code.visualstudio.com/download. Select the package with the button .deb and select the option “Open with Software install (default)” in the dialog box. After the download, the Ubuntu Software Center will appear, where the “Install” button must be pressed.
Hint
If, as in my case, the installation does not work this way, the package with the option “Save” download and install with the following command
sudo dpkg -i code_1.17.1-1507645403_amd64.deb.Next git with `` sudo install apt-get install git-all`` and configure user / e-mail correctly. The Commands for this are
git config --global user.name = "Max Mustermann"orgit config --global user.email = "Max.Mustermann@abc.com".Open Visual Studio Code. The easiest way to do this is to enter VSCode in the search, select “Visual Studio Code” and add it to the launcher for the future.
At the “Welcome” screen of VS Code, select “Clone Git Repository”. Then the link to your own fork on Github must be inserted. Confirm the default directory and confirm “Open Repository” after downloading. For the topic github (create user, create fork, etc.) please refer to the section General preparations in the documentation.
Install the extension restructuredtext in the VS Code Editor. To do this, go to the menu item “View -> Extensions -> restructuredtext” and then select “install”. Then reload the editor!
Install extensions
After a single reload of the editor, the extension is available.
Hint
The installation of Python is not discussed here, as Python is already preinstalled on Ubuntu (and most other Linux distributions).
Install Python pip because it requires additional Python tools for the development environment. To do this, first run
sudo apt-get update && sudo apt-get -y upgradein the terminal window to bring all installed packages to their last state. This can take up to 30min. Then runsudo apt-get install python-pip.In the Cometvisu folder (in which git saved the repository)
sudo -H pip install -r utils/requirements.txt. This will install all required packages.Open Visual Studio Code again. If the CometVisu project is no longer open, open it again with “File -> Open Recent”.
If everything is set up correctly, you can open an RST file from the documentation and open the Live Preview window with `` Ctrl + Shift r``. Changes to the RST file should then be automatically displayed in preview windows with a short delay.
Depending on the available computer performance, it may be necessary to restrict the refreshing of the preview. Under Settings (symbol in VS code bottom left) -> select Settings. A file “User Settings” opens. Enter “restructured” in the search field. Then the existing settings of the Extension RestructuredText appear.
The following parameters are by default set to “onType” or “true”. With the following settings, the preview is only updated when saving the current file and calling the preview again:
// Whether the linter is run on save or on type or disabled.
"restructuredtext.linter.run": "onSave",

// Flag to control whether text changed event triggers preview update.
"restructuredtext.updateOnTextChanged": "false",
To do this, insert the two parameters in the settings.json file in the Cometvisu project (directory .vscode). Then save the file and restart Visual Studio code.
So in the end Visual Studio Code should look like with the live preview of a rst-file:
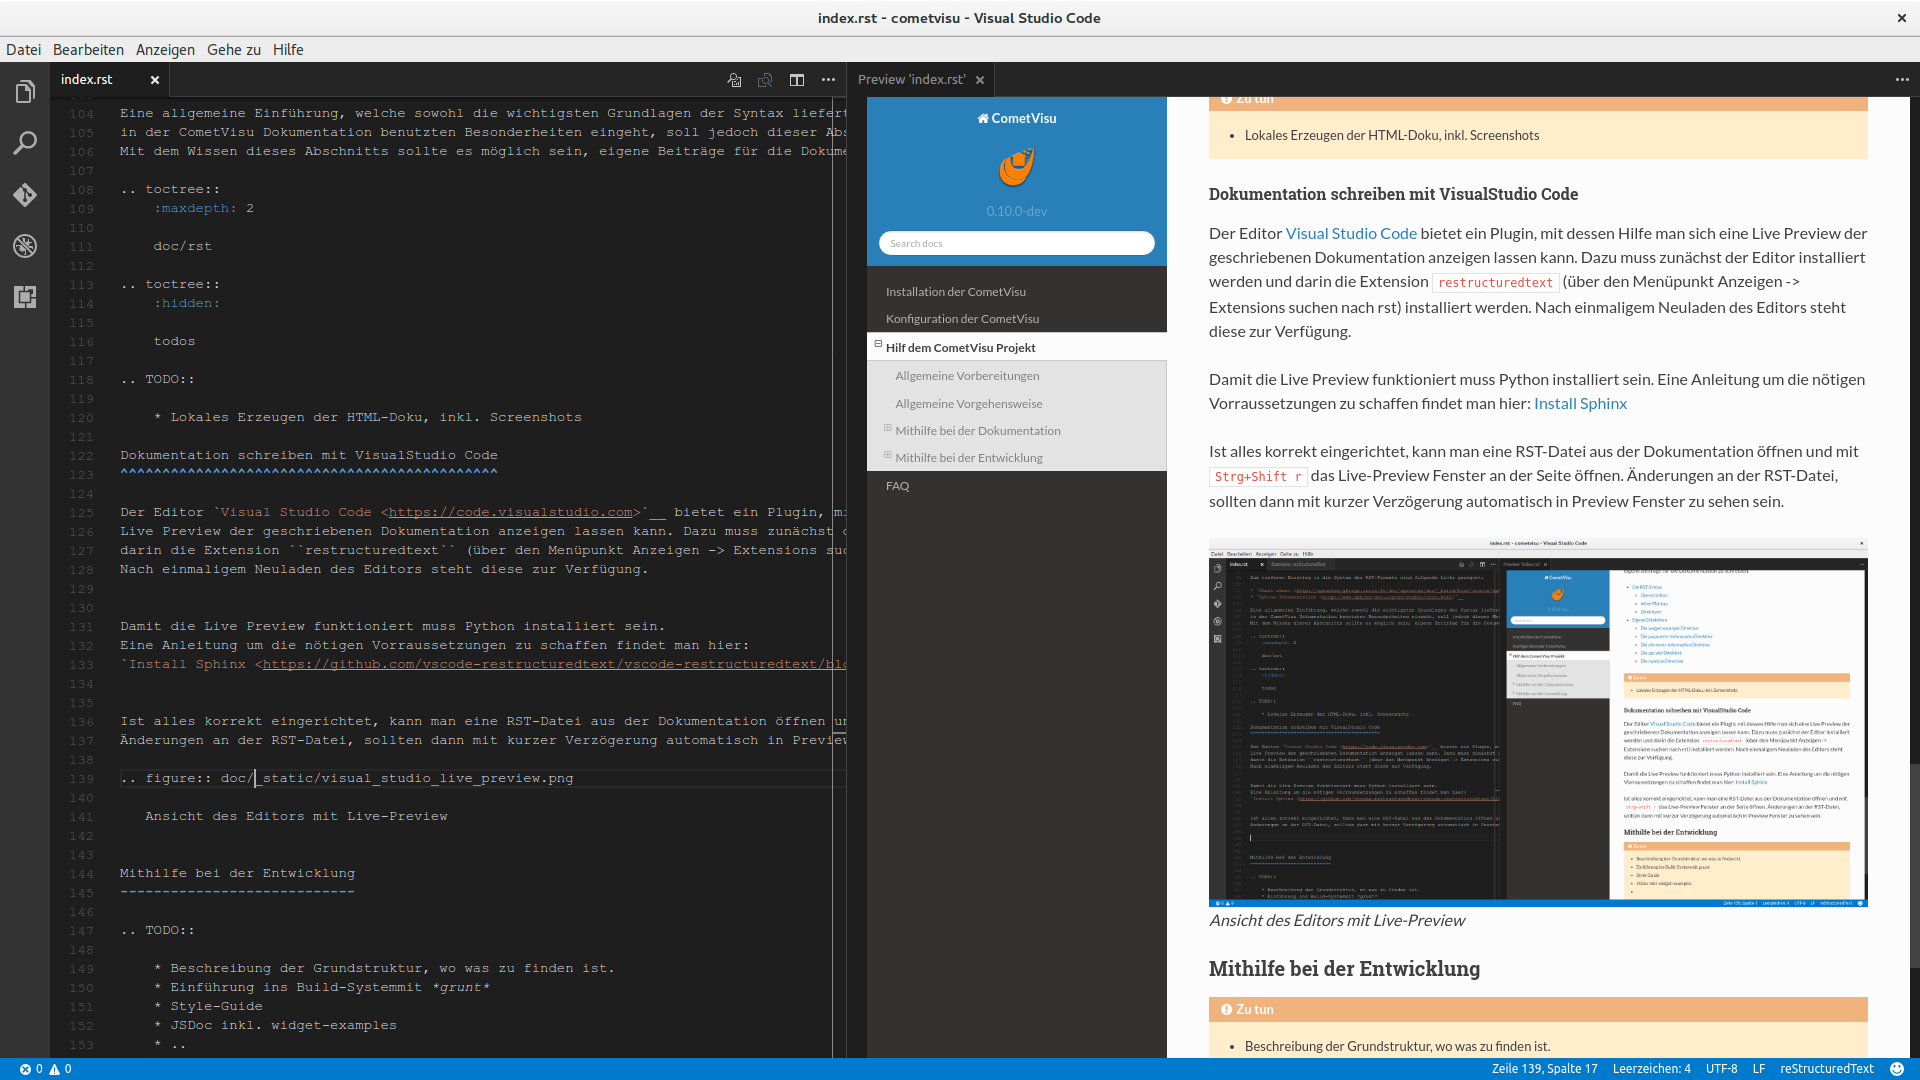
Editors with Live-Preview